VisualSVN Server provides an almost zero-configuration full-text search solution for your repositories. To start using it, all you have to do is enable search indexing in the server properties.
Overview
The process of getting started with full-text search consists of the following main steps:
- Enable search indexing on the server
- Fine-tune indexing for individual repositories (optional)
- Monitor the search indexing status
- Perform search in the web interface
How do search and indexing work?
Search index
The full-text search feature uses an index to respond to search queries.
The index is managed by the dedicated VisualSVN Search Index service. This service responds to all search requests and continuously updates the index when new commits occur in the repositories. Enabling indexing in the server configuration automatically enables and starts the Search Index service.
Repository indexing
Indexing of the repository can be viewed as a process that consists of two parts: initial indexing and keeping the index up-to-date with new commits.
Initial indexing is a part where all versioned changes in the repository are added to
the index. It starts from the oldest revision and finishes after indexing the current
HEAD revision. This process can take a significant amount of time to
complete, depending on the size of the repository.
After the initial indexing is complete, the repository index is automatically kept up-to-date with new commits. Generally, this is a low-latency process and the index can be swiftly updated even in response to a search request that happens immediately after a commit.
Step 1: Enable search indexing on the server
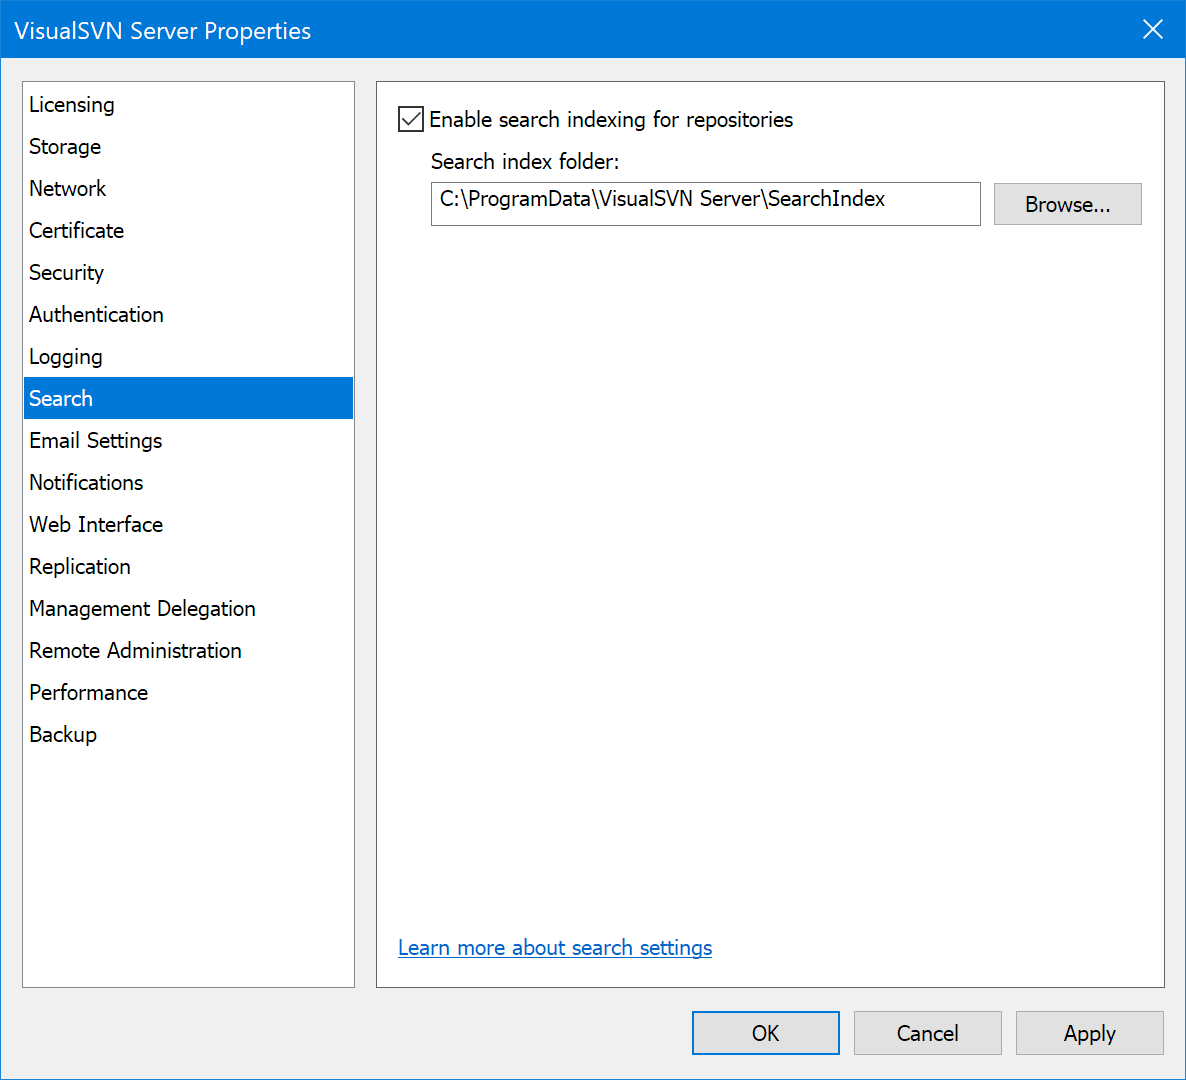
The search configuration of the server consists of two options: whether the search indexing is enabled and the location of the search index folder.
To use the full-text search feature, you have to enable search indexing on the server. Enabling the search indexing also activates the core search function — it allows users to search through the content in the web interface.
Follow these steps to enable search indexing on the server:
- Start the VisualSVN Server Manager console.
- Click the Action | Properties main menu command.
- Click the Search tab.
-
Select Enable search indexing for repositories.
Note
Full-text search is available with all paid VisualSVN Server licenses, starting from an Essential license. If the server does not have a suitable license, you will be prompted to enter it or to start an evaluation. See the KB220: VisualSVN Server 5.2 Licensing Overview article for details.
-
Configure the Search index folder.
The default location is
%PROGRAMDATA%\VisualSVN Server\SearchIndex, but it is generally recommended to change it to a location that is more suitable for your environment. Please consider the list of the search index folder requirements below. - Click Apply.
After these steps, the contents of your repositories will be indexed in the background. As the repositories gradually complete their initial indexing, users will be able to search for contents in the web interface.
Search index folder requirements
There are the following requirements for the search index location:
-
The selected location should have enough free disk space to store the search indexes of the repositories you would like to index.
The size of a search index can be estimated at 30-60% of the repository size. You can use the
Measure-SvnRepositoryPowerShell cmdlet to collect the repository size statistics in your environment. - The search index folder must be located on a local fixed disk. Other locations, such as removable or network disks, are not supported.
-
The path to the search index folder must point to a non-existing or empty directory.
As an exception, you can specify a path to an existing non-empty directory that has been previously used to store the search index.
- The volume containing the search index folder must support sparse files. Sparse files are supported by NTFS and ReFS file systems.
- It is highly recommended to use a solid state drive (SSD) instead of a hard disk drive (HDD) for the search index location. SSD drives offer better overall performance for both read and write operations on the search index.
Step 2: Fine-tune indexing for individual repositories (optional)
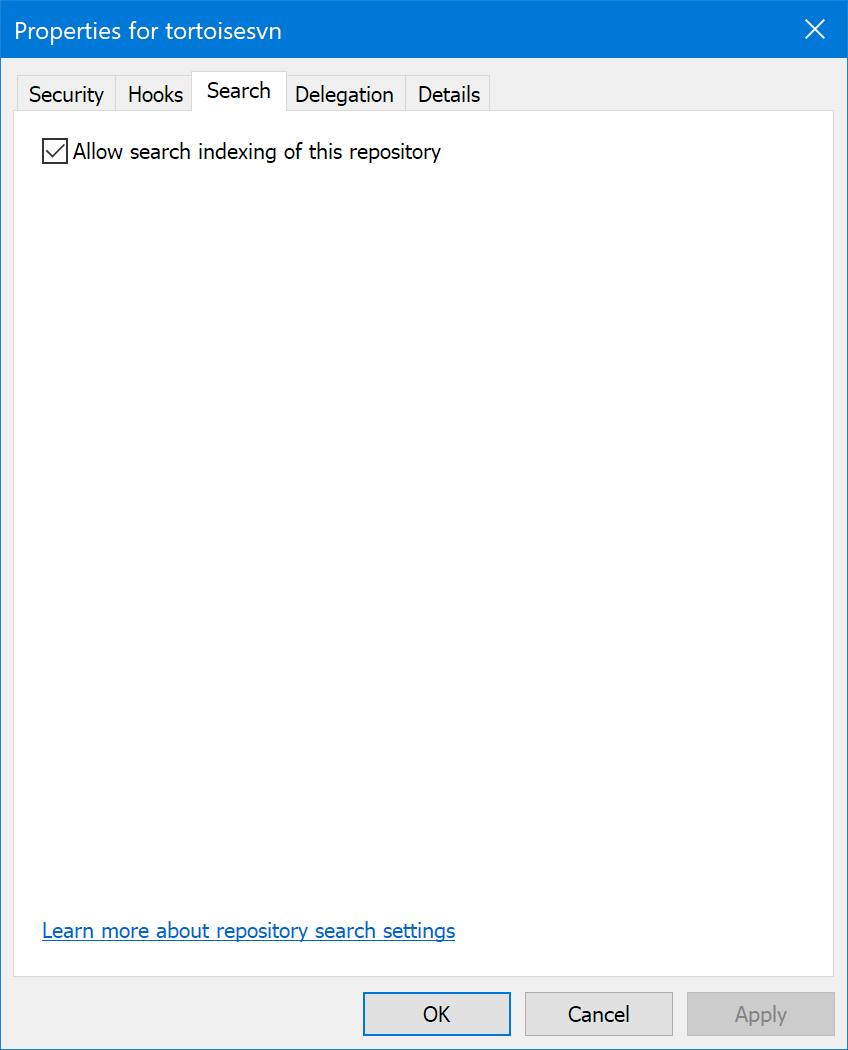
The search configuration of the repository consists of a single option: whether it is allowed to index the contents of this repository.
By default, all repositories are configured to allow indexing of their contents. Disabling indexing of the repository removes the associated search index data and deactivates search functions for that specific repository.
You can disable indexing for a specific repository in its Properties window or by using the context menu in the Search Index Status dialog.
Follow these steps to disable search indexing for the repository:
- Start the VisualSVN Server Manager console.
- Expand the Repositories node.
- Right-click the repository and click Properties.
- Click the Search tab.
- Clear the Allow search indexing of this repository checkbox.
- Confirm the action by clicking Yes in the displayed warning dialog.
- Click Apply in the Properties of the repository.
Step 3: Monitor the search indexing status
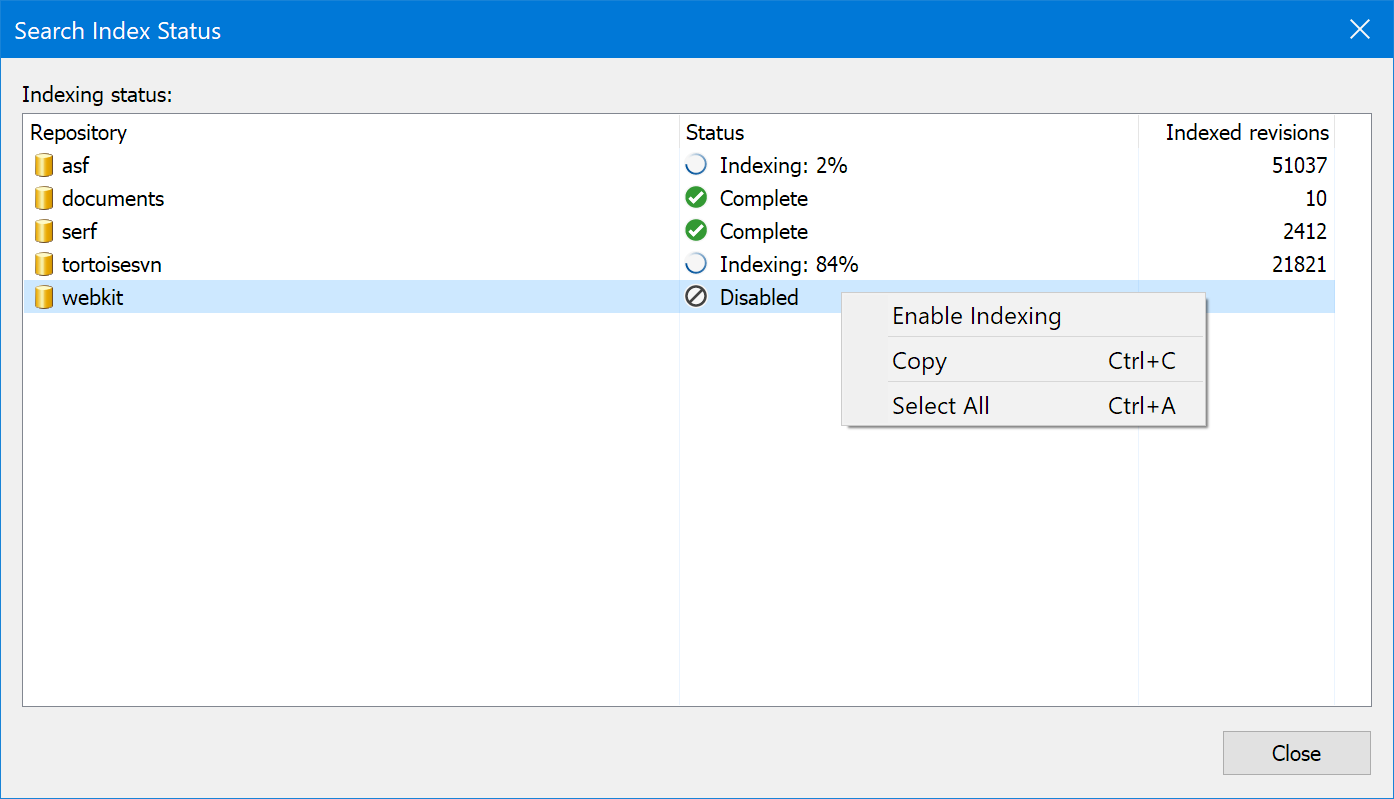
The search indexing status can be monitored by opening the Search Index Status dialog in VisualSVN Server Manager.
This dialog supports viewing the indexing status, progress and error information. It also supports enabling or disabling search indexing for specific repositories.
Follow these steps to open the Search Index Status dialog:
- Start the VisualSVN Server Manager console.
- Click the Action | All Tasks | Show Search Index Status main menu command.
Step 4: Perform search in the web interface
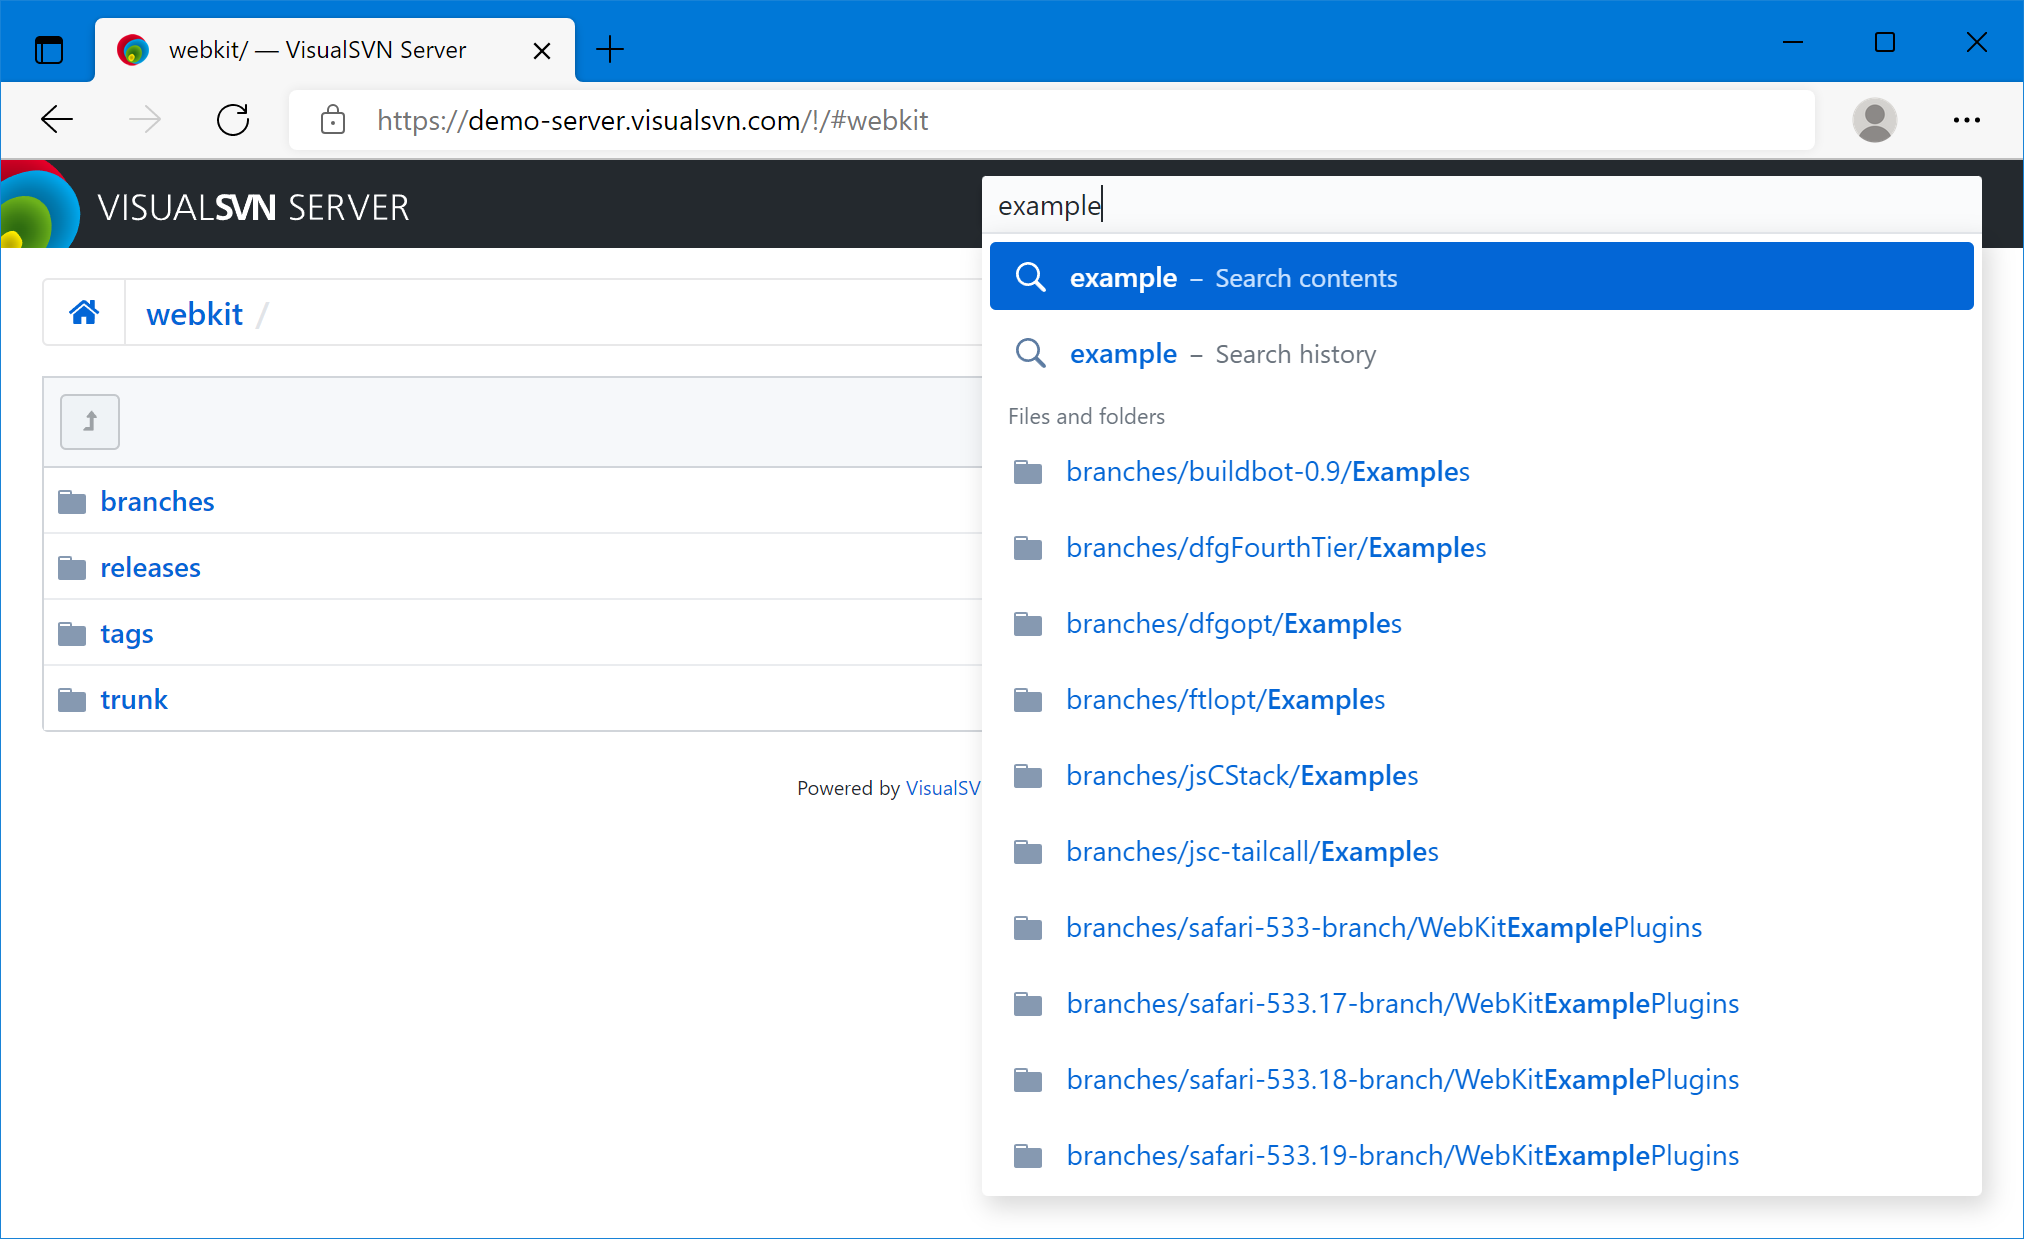
After a repository completes its initial indexing, it becomes possible to search through its contents in the web interface.
Follow these steps to search in the web interface:
- Start the VisualSVN Server Manager console.
- Expand the Repositories node.
- Right-click a repository and click Open in Web Interface.
- Press / to activate the searchbox.
- Type the search query and press Enter.