Subversion client programs use URLs to access VisualSVN Server and the repositories that it hosts. These URLs contain the fully qualified domain name (FQDN) of the server computer and look similar to the following ones:
-
https://COMPUTER-NAME.example.com/- to access the server. -
https://COMPUTER-NAME.example.com/svn/MyRepo/- to access a specific repository.
Where the COMPUTER-NAME is the name of the server
computer (NetBIOS name) running VisualSVN Server. The computer name is
typically generated automatically by Windows and may, for example, look
something like WIN-N9CNPAA7821, or is set according to the computer naming
conventions of your organization.
When deploying VisualSVN Server into production, we recommend that you configure a custom DNS name for the server computer, to make the server's host name and URL independent from the server's computer name. So that the server's URL looks like this:
-
https://mysvn.example.com/
Follow these steps to add a custom DNS name for your VisualSVN Server installation:
- Step 1: Add a new DNS name
- Step 2: Configure a new SSL certificate for the new DNS name
- Step 3: Update the server name in VisualSVN Server Properties
- Step 4. Let the users know about the new URL
Step 1: Adding a new DNS name using a CNAME record
A new DNS name can be added to the DNS server through the DNS Manager console or through PowerShell. The operation has to be performed by a domain administrator or a user with appropriate DNS admin privileges.
The following procedure describes how to add a new DNS name using a CNAME record (also known as canonical name or alias). A CNAME record maps an alias name to the FQDN of the server computer. CNAME doesn't depend on the IP address of the server computer.
Adding a CNAME record is the preferred method for configuring a custom DNS name for the following reasons:
- Integrated Windows Authentication works out of the box with the new CNAME record,
- Easier transition when the server computer changes.
A new CNAME record can be added using the New Alias (CNAME) command
in the DNS Manager console on the DNS server. The following example
creates a new CNAME record mysvn.example.com and points it to
the DNS name of a computer COMPUTER-NAME.example.com:
- Open the DNS Manager console.
- Navigate to the required Forward Lookup Zone.
- Click Action and New Alias (CNAME).
-
Enter the following details:
Alias name:
mysvnFully qualified domain name (FQDN) for target host:
COMPUTER-NAME.example.com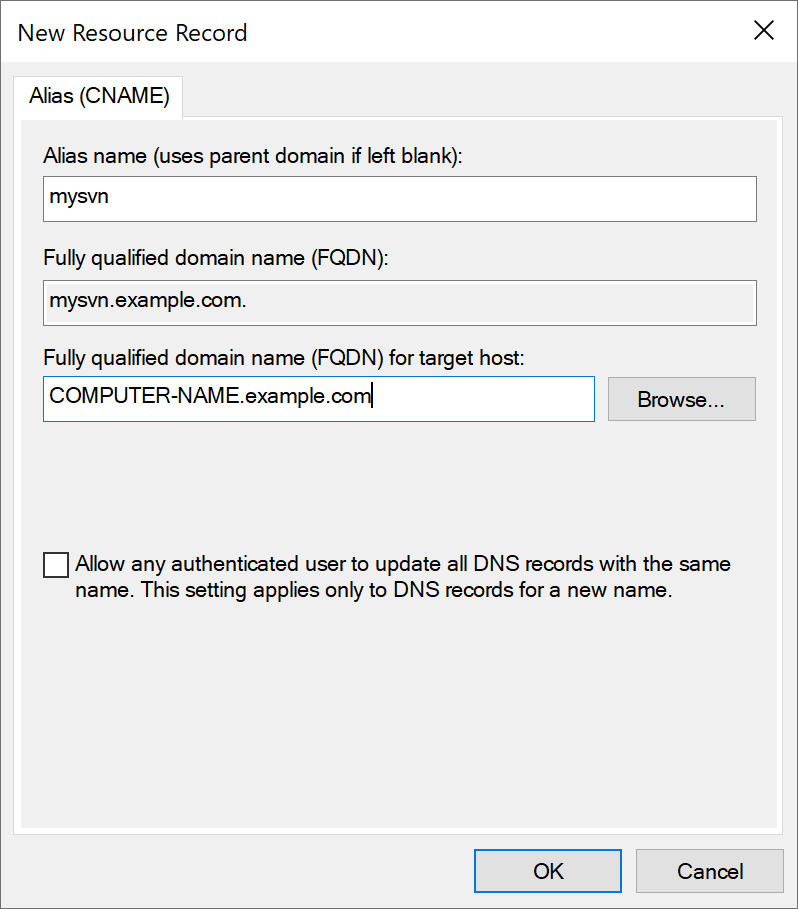
- Click OK.
The new DNS alias should become immediately available, and you can proceed to Step 2 of the procedure.
Step 2: Configuring a new SSL certificate for the new DNS name
When you change the server's DNS name and, therefore, its URL, you also need to configure a new SSL certificate. The certificate is used for traffic encryption and for verifying the server's identity when using the HTTPS protocol.
Please read Getting Started | Configuring SSL Certificate and the article KB134: Configuring SSL Certificates for VisualSVN Server for more information.
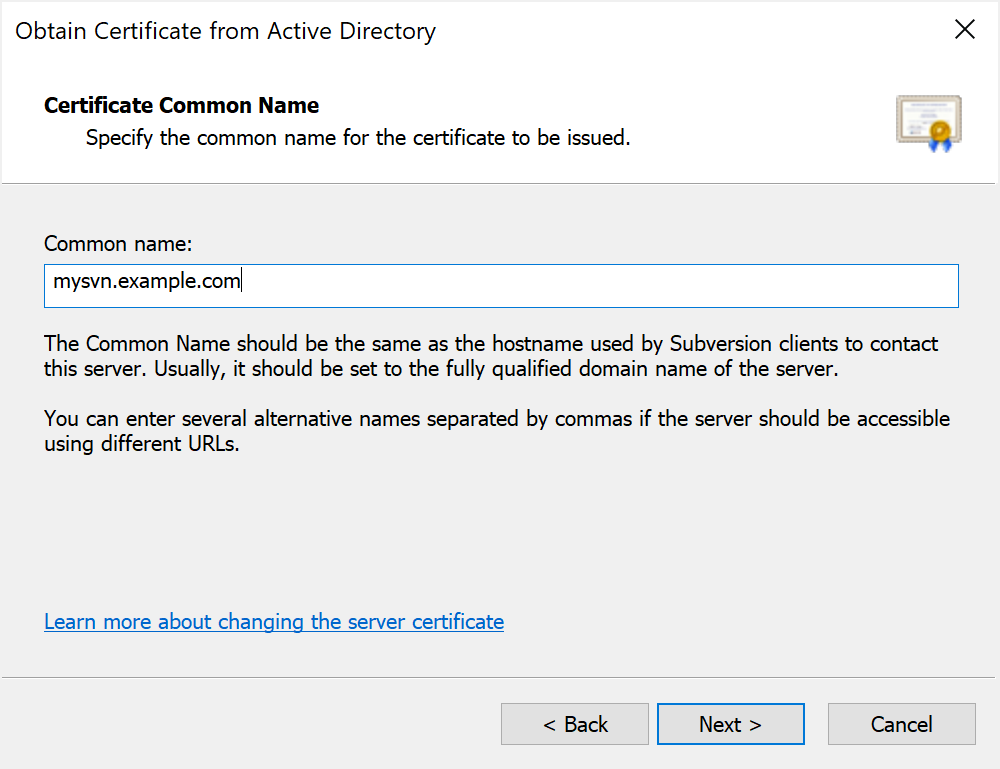
Step 3: Updating the server name in VisualSVN Server Properties
The server name in VisualSVN Server Properties typically needs to match the new DNS name. The value of this property is used when generating server certificates and for VisualSVN Server Manager commands such as 'Open in Web Interface' or 'Copy URL to Clipboard'.
Follow these steps to change the server name:
- Open the VisualSVN Server Manager console.
- Click Action | Properties.
- Click the Network tab.
- Enter the new DNS name into the Server name field.
- Click Apply.
The services of VisualSVN Server will restart, and the new server name is used in the console from now on.
The setup of the new server DNS name is complete, and your repositories are now available at the new URL.
Step 4. Let the users know about the new URL
With the introduction of a new DNS name, the URLs to repositories change. End users who have working copies checked out using the old URL need to relocate their working copies to the new URL or check out new working copies. Read the following pages for more information:
Alternative Step 1: Adding a custom DNS name using an A record
Step 1 of the main procedure above provides instructions on how to add a custom DNS name by using a CNAME record. However, certain configurations (for example, a VDFS replication cluster that uses one DNS name for several servers) may require adding an A record (also known as host record). The procedure below shows how to add a new DNS name using an A record instead of CNAME. If you choose to add an A record, you still need to follow the rest of the main procedure (Step 2, Step 3 and Step 4).
Adding an A record is a method suitable in cases when adding CNAME isn't possible. An A record ties to an IP address, and therefore, IP addresses of VisualSVN Server computers must be statically assigned or reserved in DHCP. Configuring DNS names using an A record requires adding an SPN (Service Principal Name) record in the Active Directory environment for the Integrated Windows Authentication to work with the new DNS name.
Adding an A record for a DNS name
An A (host) DNS record is used to associate a DNS name with a specific IP address. An A record can only point to an IP address and never to another DNS name. When adding an A record, you need to specify a new DNS name and the IP address of the VisualSVN Server computer to which the new DNS name will point.
An A record can be added using the New Host (A or AAAA) command in
the DNS Manager console on a DNS server. The following example creates a
new A record mysvn.example.com and points it to the IP address
192.168.2.2:
- Open the DNS Manager console.
- Navigate to the required Forward Lookup Zone.
- Click Action and New Host (A or AAAA).
-
Enter the following details:
Name:
mysvnIP address
192.168.2.2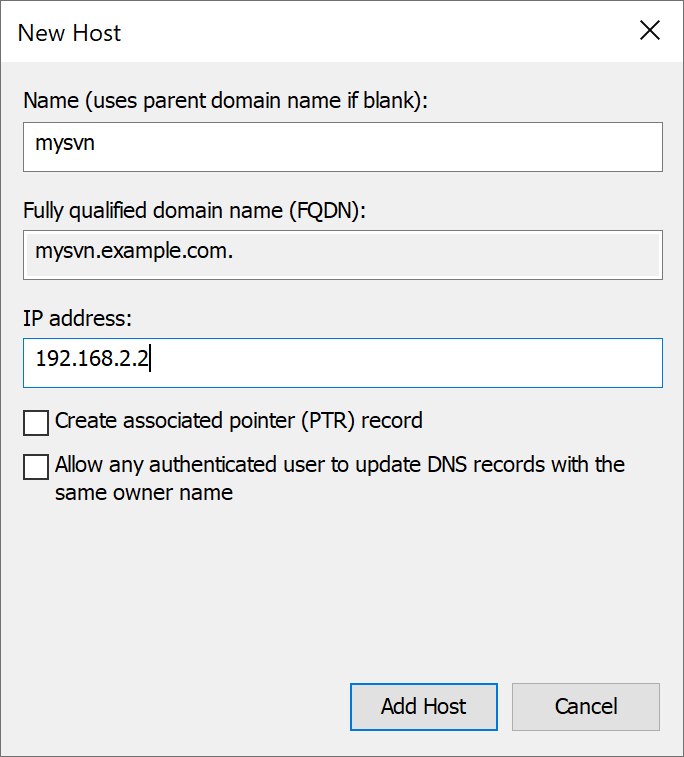
- Click Add Host.
Adding SPN records
You need to add an SPN (Service Principal Name) record to make Kerberos authentication work with the new DNS name when accessing your repositories over HTTP(S). Issuing Kerberos authentication tickets requires a valid SPN to be present, so when the SPN is missing the server may refuse to authenticate clients or to use Kerberos. Depending on your environment, authentication can fall back to a less secure authentication protocol.
A new SPN can be added using the
setspn
command-line tool. The setspn commands should be executed in
an elevated command prompt by a domain administrator or a user with the
necessary delegated permissions. For additional information on permissions
required to modify SPNs, please read the
Setspn Command-Line Reference.
Adding SPN for the HTTP service
The exact command depends on your environment and on the service account
used to run the VisualSVN Server HTTP Service. By default, VisualSVN
Server services run under the Network Service account. You can find out
the account used in your case by looking at the properties of the
VisualSVN HTTP Service in the services.msc console on the
server computer.
Depending on the account used for running the HTTP service, choose one of the two options below:
-
When the VisualSVN HTTP Service runs under the
Network Serviceaccount (it does so by default), run the following command to add the new SPN with the HTTP service class:setspn -s HTTP/mysvn.example.com COMPUTER-NAME
You need to replace the DNS name
mysvn.example.comandCOMPUTER-NAMEwith the actual values present in your environment. The computer nameCOMPUTER-NAMEabove corresponds to the name of the server computer that an instance of VisualSVN Server is running on. -
When the VisualSVN HTTP Service was customized to run under a custom dedicated account, run the following command to add the new SPN with the HTTP service class:
setspn -s HTTP/mysvn.example.com DOMAIN\accountname
You need to replace the DNS name
mysvn.example.comwith the actual value present in your environment. You also need to replace the account nameDOMAIN\accountnamewith the actual name of the account used to run the VisualSVN HTTP Service.